下面就是演示效果。
下面是代码。需要自己把<img src=”2.png” style=”background-color: bisque;”> 代码中的2.png,换成自己的图片路径。
<!DOCTYPE html> <html lang="en"> <head> <meta charset="UTF-8"> <meta name="viewport" content="width=device-width, initial-scale=1.0"> <title>轮播图</title> <style> *{ margin: 0; padding: 0; text-decoration: none; list-style: none; background-repeat: no-repeat; } .carousel { position: relative; width: 100%; overflow: hidden; } .carousel-inner { display: flex; width: 100%; transition: transform 0.6s ease-in-out; } .item { flex: 0 0 100%; height: 55vh; } .item img { width: 100%; height: 100%; object-fit: cover; } .carousel-control { position: absolute; top: 50%; transform: translateY(-50%); color: #fff; font-size: 80px; z-index: 10; cursor: pointer; } .left { left: 25px; } .right { right: 25px; } .dots { position: absolute; bottom: 20px; left: 50%; z-index: 15; width: 60%; padding-left: 0; margin-left: -30%; text-align: center; list-style: none; } .dots > li { display: inline-block; width: 10px; height: 10px; margin: 1px; cursor: pointer; background-color: rgba(0,0,0,0); border: 1px solid #fff; border-radius: 10px; } .dots .active { width: 12px; height: 12px; margin: 0; background-color: #fff; } </style> </head> <body> <div class="carousel" id="carousel"> <div class="carousel-inner"> <div class="item"> <img src="1.png" style="background-color: pink;"> </div> <div class="item"> <img src="2.png" style="background-color: bisque;"> </div> <div class="item"> <img src="3.jpg" style="background-color: rgb(144, 255, 236);"> </div> <div class="item"> <img src="4.jpg" style="background-color: rgb(248, 99, 124);"> </div> <div class="item"> <img src="5.jpg" style="background-color: rgb(210, 161, 250);"> </div> </div> <div class="carousel-control left" onclick="prevSlide()">‹</div> <div class="carousel-control right" onclick="nextSlide()">›</div> <div class="dots"> <li class="active" onclick="jumpToSlide(0)"></li> <li onclick="jumpToSlide(1)"></li> <li onclick="jumpToSlide(2)"></li> <li onclick="jumpToSlide(3)"></li> <li onclick="jumpToSlide(4)"></li> </div> </div> </body> <script> let items = document.querySelectorAll('.item'); let current = 0; function showSlide() { items.forEach(item => { item.style.transform = `translateX(-${current * 100}%)`; }); updateDots(); } function prevSlide() { if (current > 0) { current--; } else { current = items.length - 1; } showSlide(); } function nextSlide() { if (current < items.length - 1) { current++; } else { current = 0; } showSlide(); } let timer = setInterval(nextSlide, 3000); function pauseTimer() { clearInterval(timer); } function resumeTimer() { timer = setInterval(nextSlide, 3000); } document.getElementById('carousel').addEventListener('mouseover', pauseTimer); document.getElementById('carousel').addEventListener('mouseout', resumeTimer); let dots = document.querySelectorAll('.dots li'); function updateDots() { dots.forEach(dot => { dot.classList.remove('active'); }); dots[current].classList.add('active'); } function jumpToSlide(index) { current = index; showSlide(); updateDots(); } </script> </html>
需要自己把<li><img src=”1.jpg” alt=”” /></li>中的2.png,换成自己的图片路径。
<!DOCTYPE html>
<html lang="en">

<head>
<meta charset="UTF-8">
<meta http-equiv="X-UA-Compatible" content="IE=edge">
<meta name="viewport" content="width=device-width, initial-scale=1.0">
<title>跑马灯轮播图</title>
<style>
* {
margin: 0;
padding: 0;
}
.carousel {
width: 650px;
margin: 50px auto;
position: relative;
overflow: hidden;
/* 超出部分隐藏 */
}
/* 标题-轮播图 */
h1 {
text-align: center;
}
.carousel ul {
list-style: none;
/* 消除ul自带圆点 */
}
.carousel #list {
width: 6000px;
position: relative;
left: 0px;
/* 初始位置 */
transition: left 0.5s ease 0s;
/*图片跳转的过渡效果*/
}
.carousel #list img {
width: 650px;
}
.carousel #list li {
float: left;
/* li排成一排显示 */
}
/* 上一张/下一张控制按钮 */
.carousel>a {
position: absolute;
width: 30px;
height: 50px;
/* 垂直居中,距顶部一半的父元素盒子宽度,再向上移动自身的一半 */
top: 50%;
margin-top: -25px;
background-color: rgba(163, 166, 167, 0.5);
}
.carousel>a>img {
margin-left: -8px;
}
.carousel .leftbtn {
left: 20px;
}
.carousel .rightbtn {
right: 20px;
}
/* 底部定位圆点list */
.carousel #location_list {
width: 120px;
position: absolute;
top: 350px;
left: 270px;
}
.carousel #location_list li {
float: left;
width: 10px;
height: 10px;
border-radius: 50%;
margin: 5px;
border: 1px solid white;
}
/* 圆点被激活时的样式,动态为圆点增加class */
.carousel #location_list li.active {
background-color: bisque;
}
</style>
</head>

<body>
<h1>轮播图</h1>
<div class="carousel">
<!--图片列表 -->
<ul id="list">
<li><img src=" 380x268.jpg" alt="" /></li>
<li><img src="1.jpg" alt="" /></li>
<li><img src="2.jpg" alt="" /></li>
<li><img src="images/number/4.jpg" alt="" /></li>
<li><img src="images/number/5.jpg" alt="" /></li>
</ul>
<!-- 左右按钮 -->
<a href="javascript:;" class="leftbtn"><img src="./images/lunbo/chevron-left.png" alt="" srcset=""></a>
<a href="javascript:;" class="rightbtn"><img src="./images/lunbo/chevron-right.png" alt="" srcset=""></a>
<!-- 圆点列表 -->
<ul id="location_list">
<!-- 默认激活第一个 -->
<li class="active"></li>
<li></li>
<li></li>
<li></li>
<li></li>
</ul>
</div>
<script>
var carousel = document.querySelector(".carousel");
// 获取图片列表ul
var olist = document.getElementById("list");
// 获取定位数组
var location_list = document.querySelectorAll('#location_list>li');

// 向左按钮
var leftbtn = document.querySelector('.leftbtn');
// 向右按钮
var rightbtn = document.querySelector('.rightbtn');

// 将第一张图片加到最后一张,方便循环
var oli = document.querySelector("#list li:first-child")
olist.innerHTML += oli.innerHTML;

// 当前显示的图片定位
var img_location = 0;
// 当前的圆点定位
var dot_location = 0
// 定义一个全局定时器变量
var timer = null;
// 默认不上锁,该状态为了保证过渡效果能完整呈现
var islock = false;

// 定义一个全局函数,自动跳到下一张,方便鼠标移入移出时调用
function move() {
timer = setInterval(function () {
// 每隔1s点击向右按钮
rightbtn.click();
}, 1000)
}
// 页面加载后自动调用,实现自动跳转下一张
move();

// 鼠标移入,清除定时器
carousel.onmouseenter = function () {
clearInterval(timer);
}
// 鼠标移出,调用自动播放
carousel.onmouseleave = function () {
move();
}

// 点击按钮切换下一张
rightbtn.onclick = function () {
if (islock) { return; }
islock = true;
if (img_location === 5) {
// 清除过渡效果,从最后一张无缝衔接到开头
olist.style.transition = "none";
olist.style.left = "0px";
img_location = 0;
}
// 由于代码执行过快,所以需要放到异步执行语句里
setTimeout(function () {
// 跳到第二张
img_location += 1;
dot_location += 1;
olist.style.left = -650 * img_location + "px";
olist.style.transition = "left 0.5s ease 0s";
// 如果跳转后是第6张图片,实际上就是第一张图,圆点应该定位在第1个
if (img_location === 5) {
dot_location = 0;
location_list[dot_location].className = "active";
location_list[4].className = "none";
} else {
// 激活当前定位的圆点
location_list[dot_location].className = "active";
// 上一个圆点取消激活状态
location_list[dot_location - 1].className = "none"
}

}, 0)
setTimeout(function () {
islock = false;
}, 500)
};

// 点击按钮切换上一张
leftbtn.onclick = function () {
if (islock) { return; }
islock = true;
// 清除过渡效果,从第一张无缝衔接到最后一张
if (img_location === 0) {
img_location = 5;
olist.style.transition = "none";
olist.style.left = -650 * img_location + "px";
}
// 由于代码执行过快,所以需要放到异步执行语句里
setTimeout(function () {
// 跳到上一张图
img_location -= 1;
dot_location -= 1;
olist.style.transition = "left 0.5s ease 0s";
olist.style.left = -650 * img_location + "px";
// 如果跳完后是第五张图,圆点位置也要相应变成最后一个
if (img_location === 4) {
dot_location = 4;
location_list[dot_location].className = "active";
location_list[0].className = "none";
} else {
location_list[dot_location].className = "active";
location_list[dot_location + 1].className = "none"
}
}, 0)
setTimeout(function () {
islock = false;
}, 500)
}
</script>
</body>

</html>
需要自己把<a href=”#” rel=”external nofollow” rel=”external nofollow” rel=”external nofollow” rel=”external nofollow” rel=”external nofollow” >
<img src=”./images/1.jpg” alt=””></a>中的./images/1.jpg,换成自己的图片路径。
需要自己修改下代码
<!DOCTYPE html>
<html lang="en">
<head>
<meta charset="UTF-8">
<meta name="viewport" content="width=device-width, initial-scale=1.0">
<title>简单轮播图</title>
<style>
*{
margin: 0;
padding: 0;
}
.wp{
width: 250px;
height: 400px;
margin: 40px auto 0;
position: relative;
overflow: hidden;
}
#list{
display: flex;
width: 1000px;
transform: translateX(0);
/* 添加过渡动画 */
transition: all 1s;
}
.wp div img{
width: 250px;
height: 400px;
}
#box {
height: 40px;
width: 100%;
position: absolute;
background: rgba(0, 0, 0, 0.5);
left: 0;
bottom: 0;
display: flex;
justify-content: center;
align-items: center;
}
#box span {
width: 10px;
height: 10px;
background: #fff;
border-radius: 50%;
margin: 0 5px;
cursor: pointer;
}
#box span:hover{
background: pink;
box-shadow: 0 0 0 2px #ccc;
}
#r{
width: 20px;
height: 20px;
position: absolute;
top: 170px;
right: 0;
background: url(./images/右箭头.png)no-repeat 0 0/100% 100%;
}
#l{
width: 20px;
height: 20px;
position: absolute;
top: 170px;
left: 0;
background: url(./images/左箭头\ \(1\).png)no-repeat 0 0/100% 100%;
}
</style>
</head>
<body>
<!-- 外层的div,包含图片列表 -->
<div class="wp">
<div id="list">
<img src="./images/微信图片编辑_20221118164531.jpg" alt="">
<img src="./images/微信图片编辑_20221118170018.jpg" alt="">
<img src="./images/微信图片编辑_20221118170050.jpg" alt="">
<img src="./images/微信图片编辑_20221118170113.jpg" alt="">
</div>
<!-- 分页器 -->
<div id="box">
<span></span>
<span></span>
<span></span>
<span></span>
</div>
<div id="r"></div>
<div id="l"></div>
</div>
</body>
</html>
<script>
// 获取需要点击的分页器
let box = document.getElementById('box');
let spanBox = box.getElementsByTagName('span');
// 获取列表元素
let list = document.getElementById('list');

// 点击分页器
spanBox[0].onclick = function () {
list.style.transform='translateX(0px)'
};
spanBox[1].onclick = function () {
list.style.transform='translateX(-250px)'
console.log('点击了第二个图片');
};
spanBox[2].onclick = function () {
list.style.transform='translateX(-500px)'
};
spanBox[3].onclick = function () {
list.style.transform='translateX(-750px)'
};

let n = 0;
let r = document.getElementById('r');
let l = document.getElementById('l');
r.onclick = function (){
n<3? n++ :n;
console.log(n);
list.style.transform='translateX(-'+n*250+'px)'
};
l.onclick = function (){
n>0? n-- :n=0;
console.log(n);
list.style.transform='translateX(-'+n*250+'px)'
};
</script>
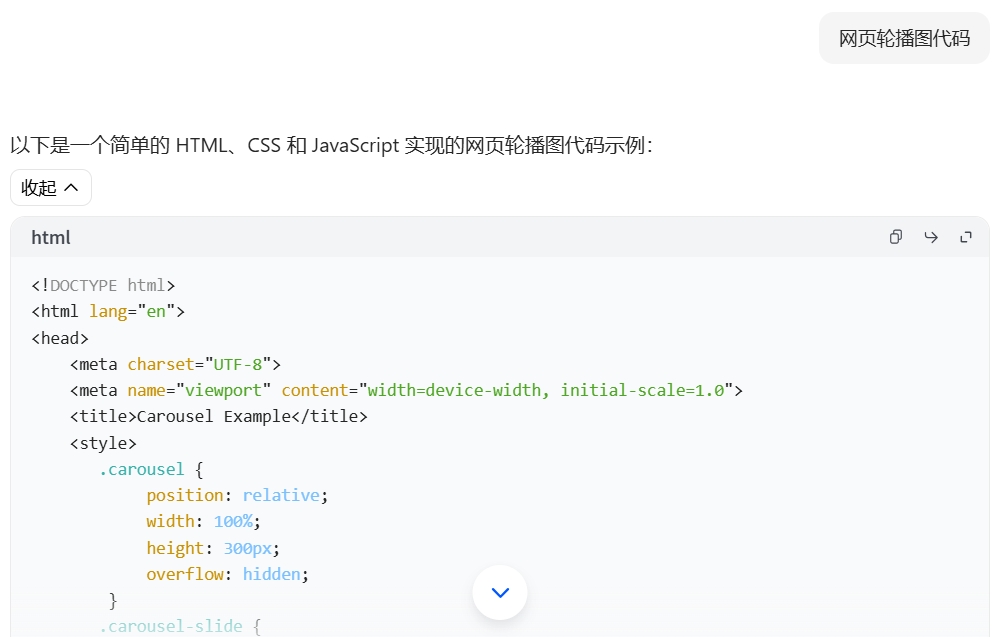
上面代码不理解,也可以用ai 直接生成代码,自己在修改下。(如下图是 豆包ai 生成代码,可以在详细问问,生成更好的。)

如还不知道,提供有偿付费指导。

 乐予博客
乐予博客


